


")
Are you looking to up your game with your absolutely Instagramable meals? Did you bake a cake even Mary Berry would be proud of? Keep reading for my tips and tricks for taking great food photos!
Now, I’m obviously not in the business of food photography, but I LOVE to cook and bake, and sometimes I even make something that looks pretty good! I’ve never had any formal training with any of the above, however, I do think I can impart some of my self-taught knowledge for your benefit. I will also share some photos of my favorite meals and desserts that I’ve posted on my personal Instagram page!
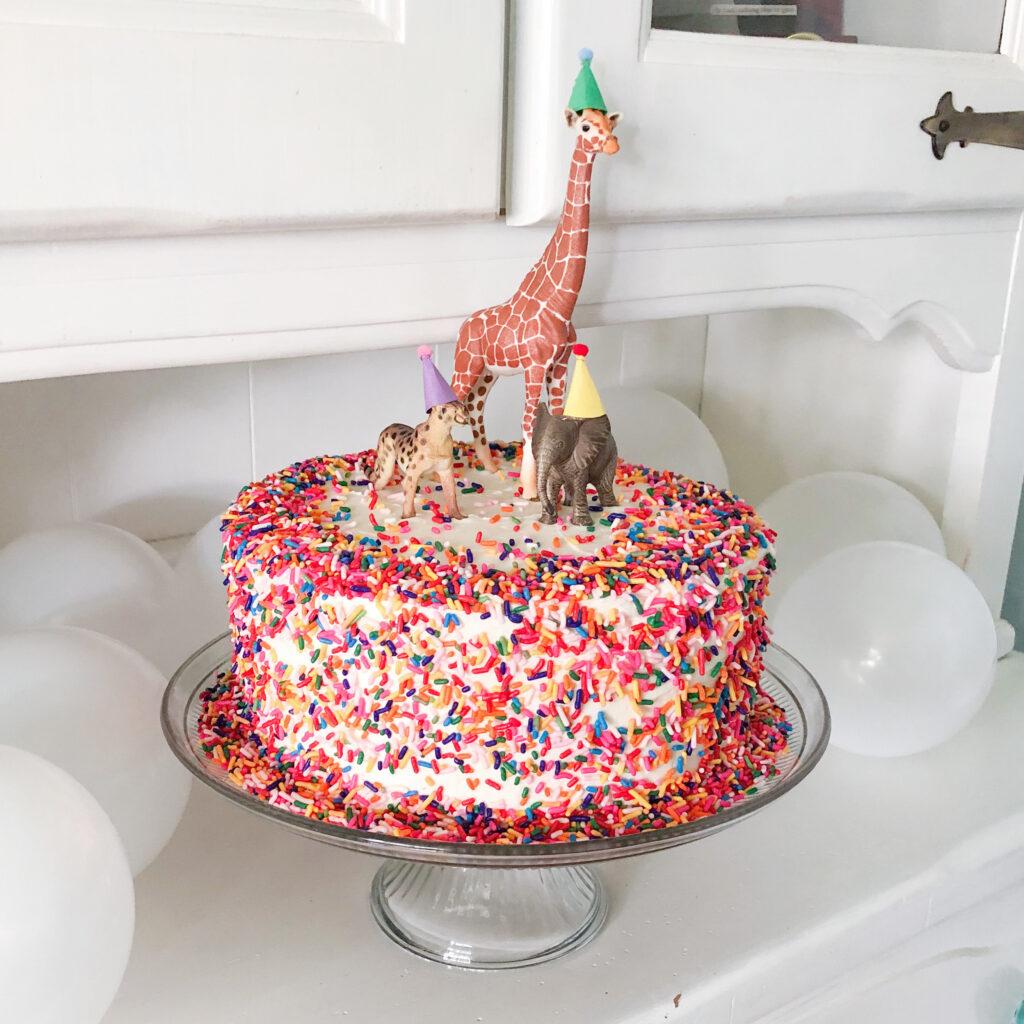
I made this rainbow sprinkle cake for my son’s 2nd birthday party and I feel like it was my magnum opus. I even made the little party hats for the animals! With this you’ll see I added balloons as props around the cake to add a little extra flair for the photo. Adding props can help increase the interest in your photo.
1. Find your light!
This one took me a while. When we moved into our new home, the place I had been taking photos of my food obviously changed, too. I struggled a bit because I LOVE taking food photos right next to a window. The light is nice and dispersed, the whites look great, and I don’t have to have any fancy lighting set up. I eventually figured out that the window in our front room later in the afternoon/early evening gave off the best light. I sometimes use it earlier in the day, but it’s not as nice which means I have to edit my photos more heavily!
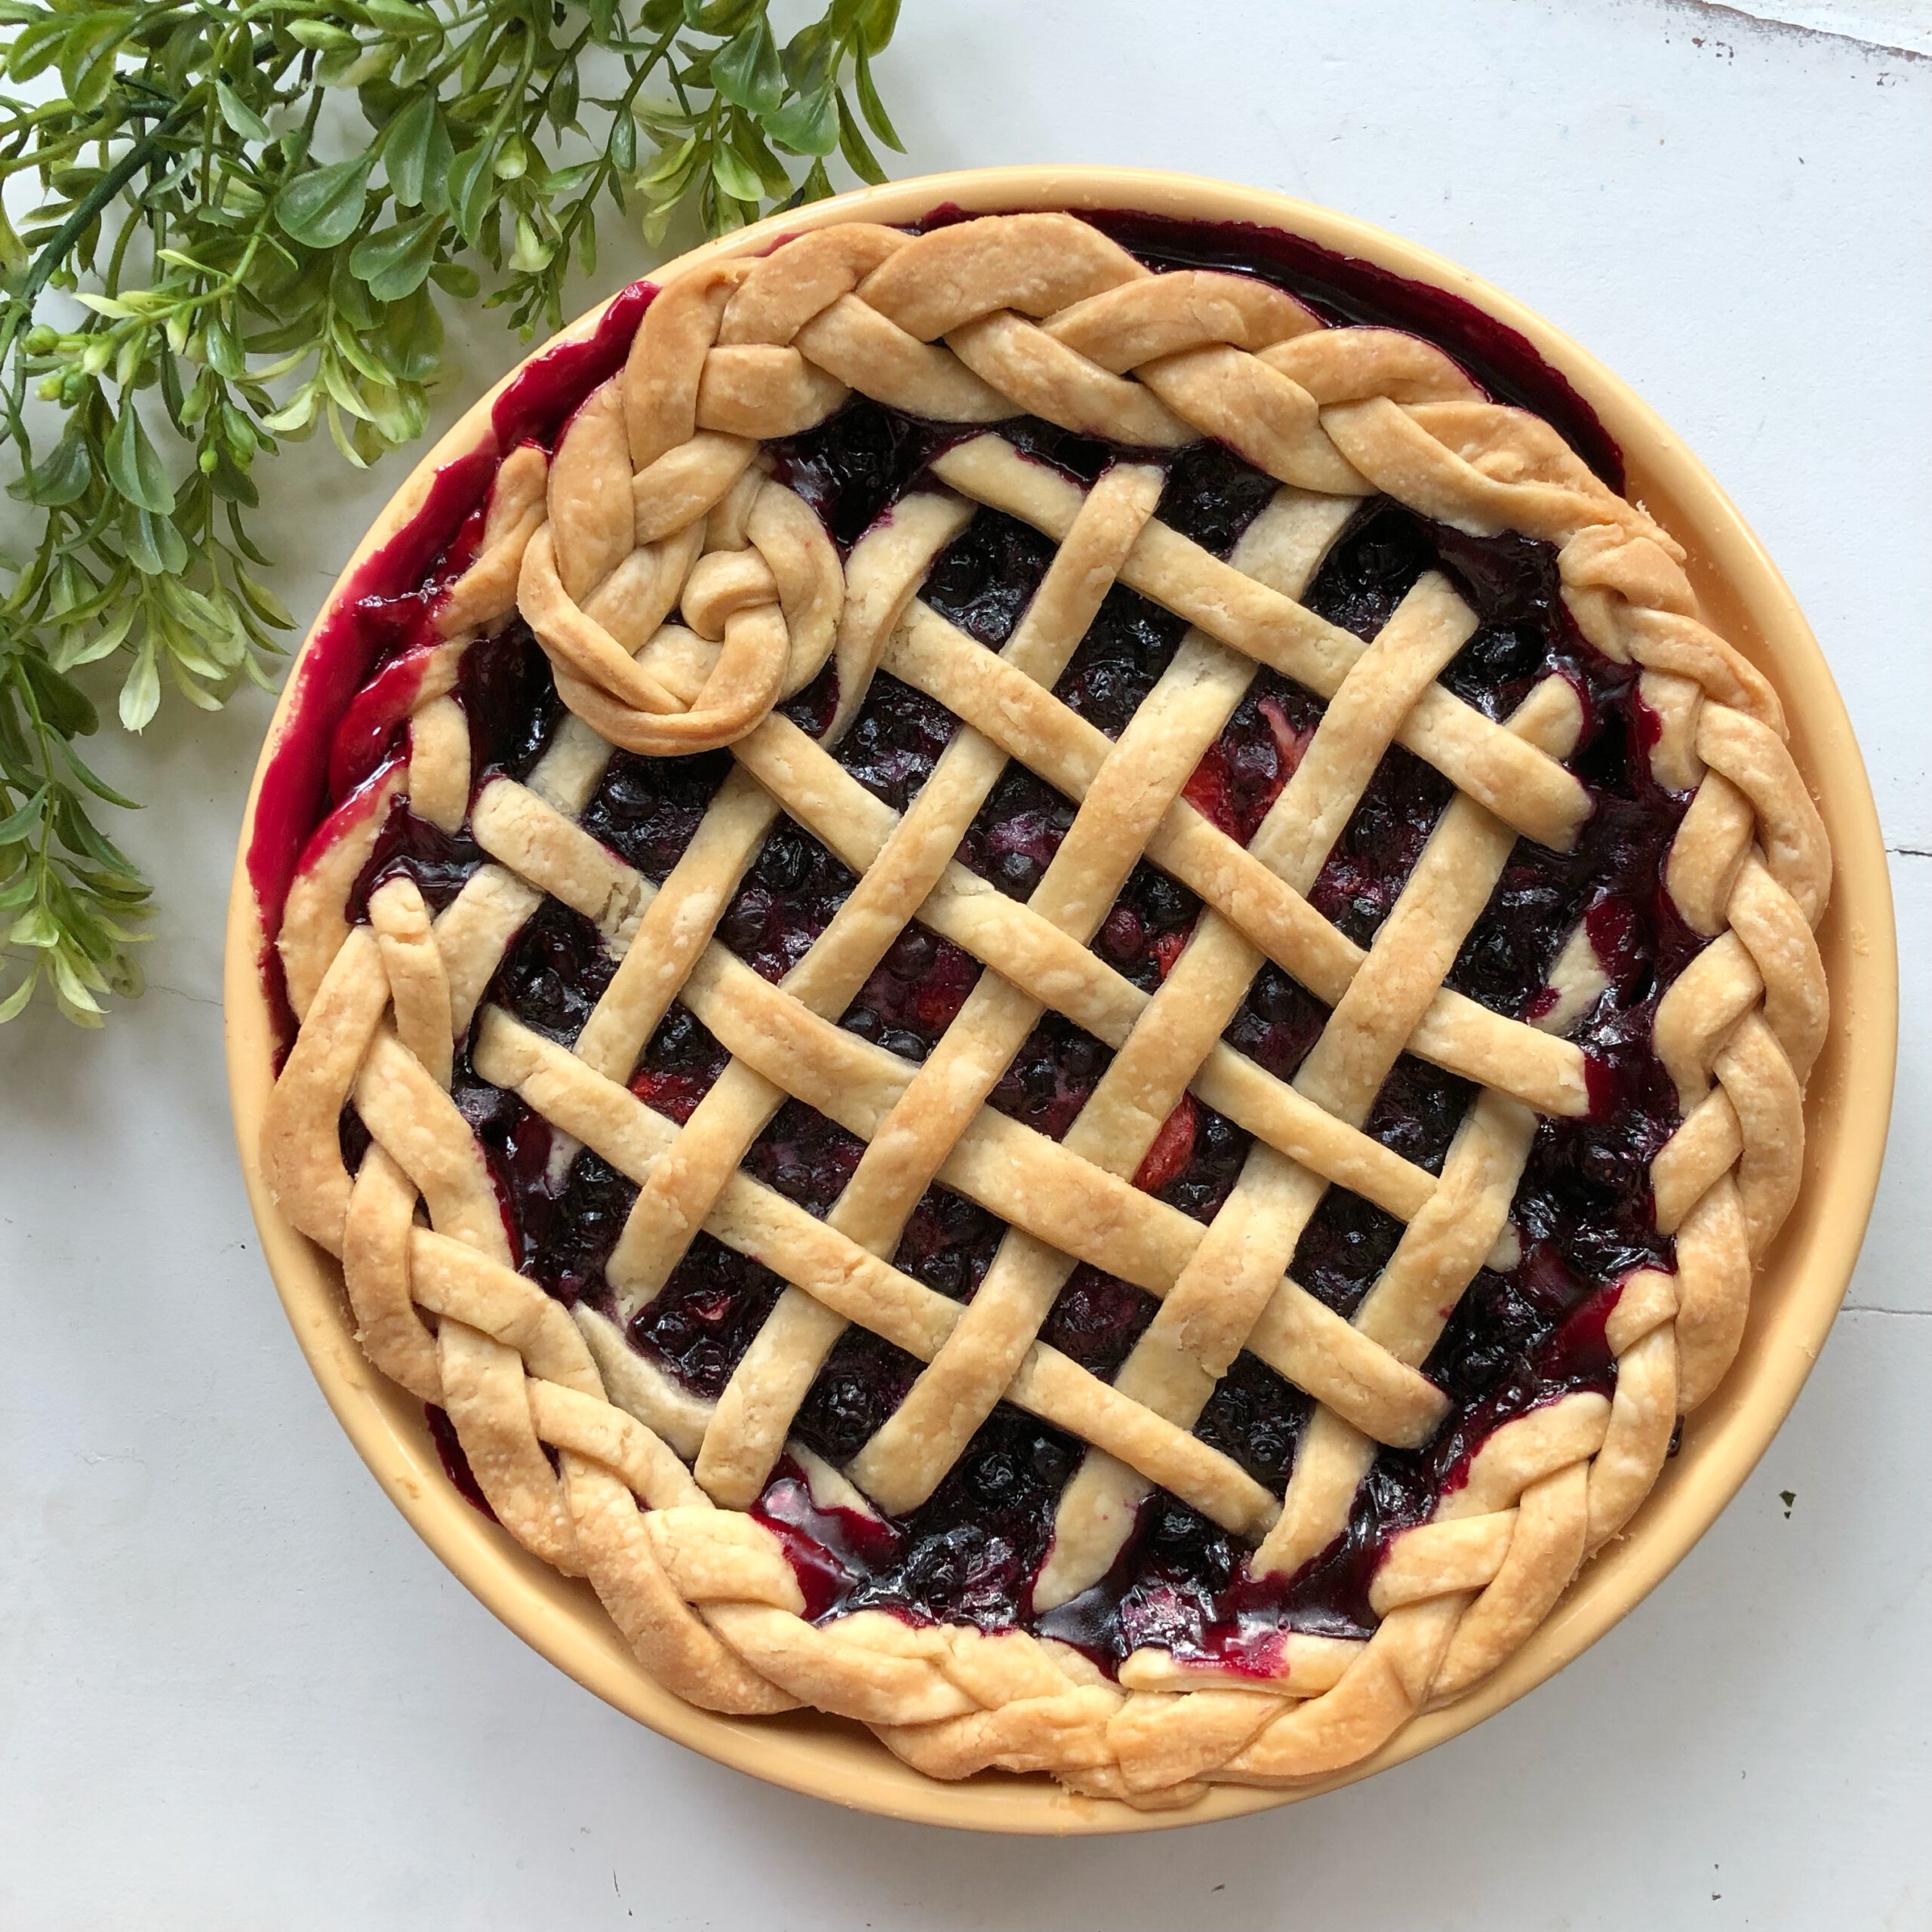
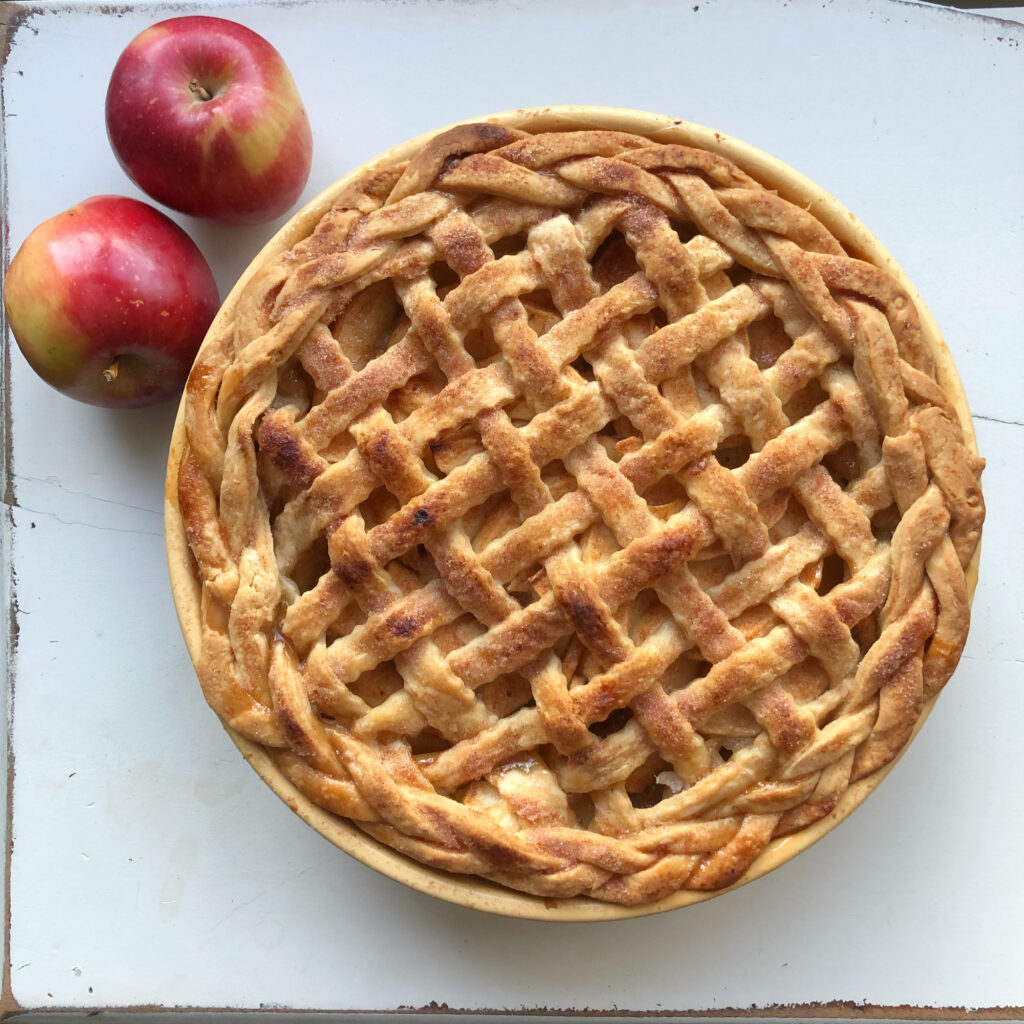
This apple pie was so incredibly delicious and because of the lattice and braiding I wanted to document my hard work. Again you see in this photo I have added props to give interest. I try to use something relevant most of the time, but sometimes I just add some pretty greenery.
2. Find your surface!
I like placing my food on a white surface, especially if that surface has some interest like cracks, paint flaking, or a rustic edge. This helps break up the image, give interest, and makes it feel cozier. The white doesn’t distract from the work you put into your food AND makes it pop! Most of the time when I post photos of my food on a white surface it’s a small entryway table that I declutter, move to the window, set up, then photograph. It’s a hassle, but I like the way it looks!
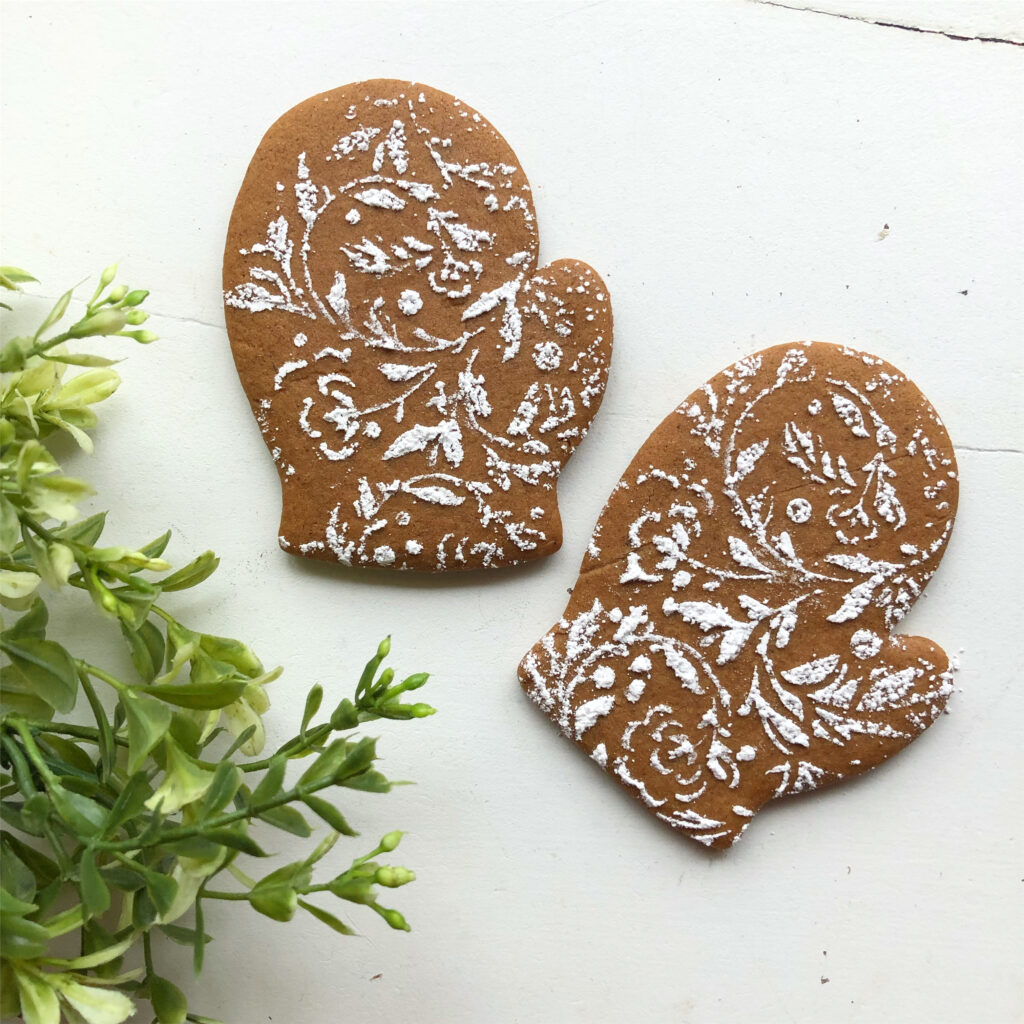
I made these mitten cookies with full intention of decorating with icing, but ran out of time before Christmas. A friend suggested just dusting with powdered sugar and I took it a step further by using a lacy stencil. I thought it was so pretty I just had to take a photo!
3 Get right on top of your food!
Most of the time that top down look is what you want. It shows off your detail best, and as of right now is fairly popular. I tend to use this style of shooting because where I’m taking photos (on a small table top) if I angle slightly you can see the background. I don’t like that look much because the food doesn’t pop as well! Also most of the time there’s some sort of mess back there, hah! This tip works well for pies, beautifully plated food, decorated cookies, etc. Anything that is pretty from the top, or nearly flat.
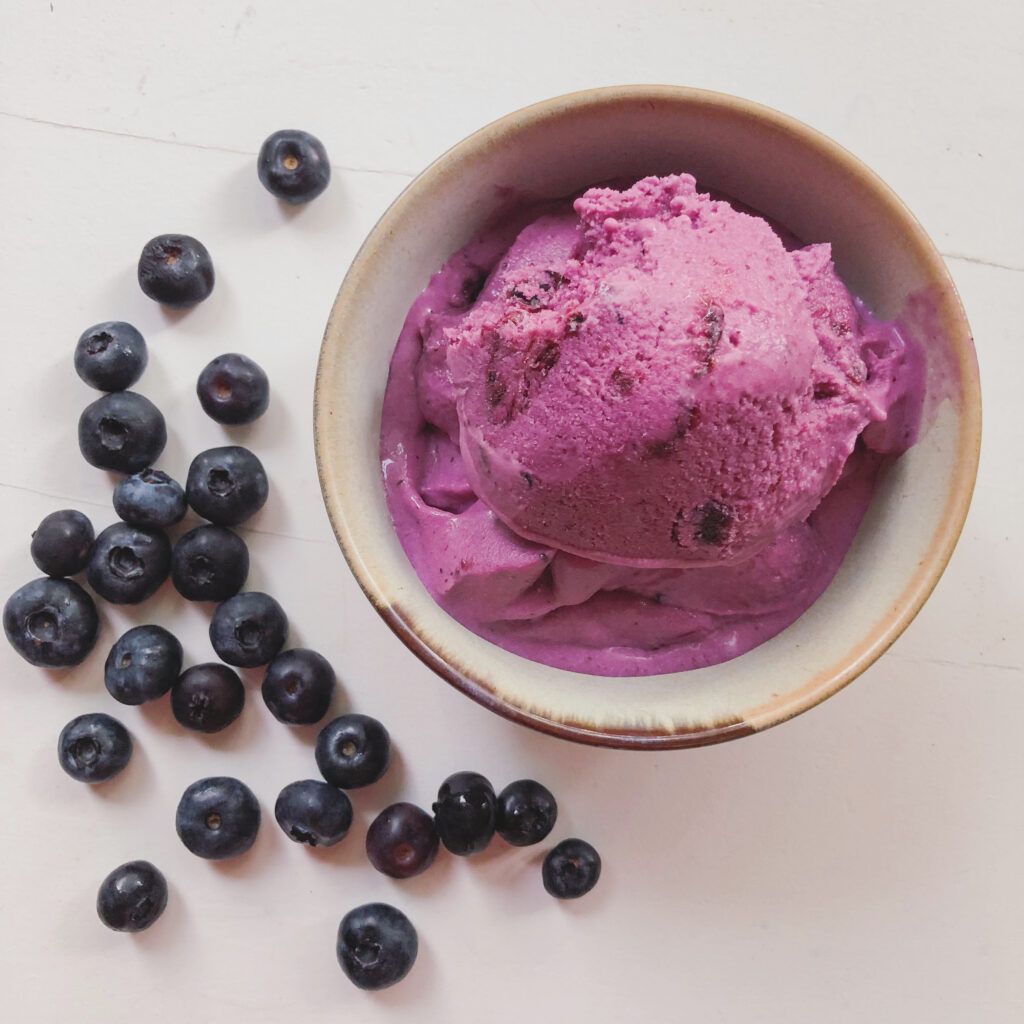
This blueberry cardamom ice cream was so delicious, but very hard to photograph! I had to sprinkle those blueberries around it to make the photo look even remotely interesting. Only then did I like the photo!
4. Ignore what I just said and take photos from the side!
Sometimes it’s better to get a side view! If I do this I find something visually interesting for the background. I like to shoot in Portrait mode if I am able (I take most of my food photos on my iPhone) so the background is blurry and doesn’t distract from the food too much. This is a similar tip to using a white surface to shoot on. You want to feature the food, not the background.
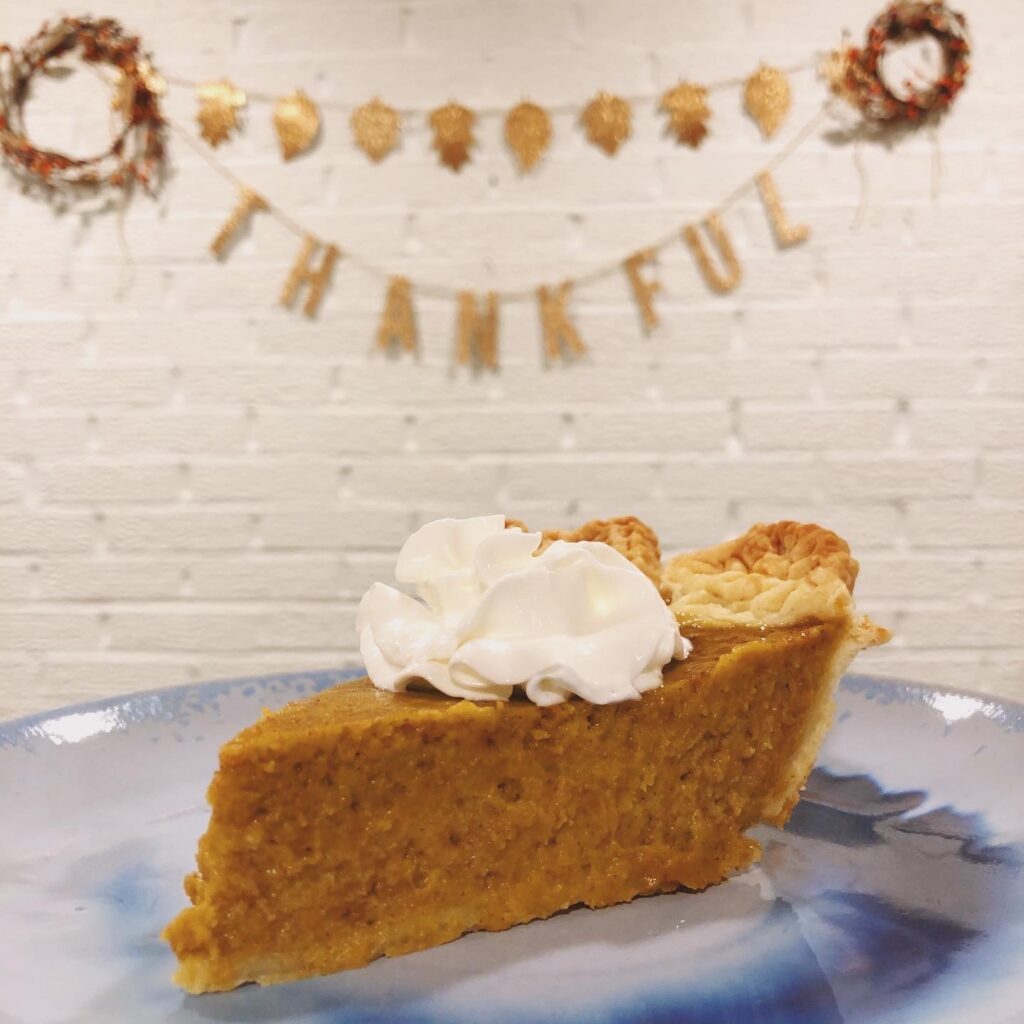
Pumpkin pie at Thanksgiving? Whipped cream beautifully sprayed on top? GOTTA TAKE A PHOTO! For this photo my natural light had already gone so I had to rely on my ceiling can lights. We like to live in warm light because it’s cozier, but it makes editing photos hard! Ceiling lights also leave lots of hard reflections on shiny surfaces like plates, and creates harsh shadows when doing top down photography. I had to get creative here because I was having problems photographing like I usually do, but I still like how this turned out! (Took lots of editing though)
5. Take time to make your plate look beautiful!
Prep work is important here if you want your photos to stand out. If you’re making something for dinner and feeling it, make sure to plate your food like a food stylist would! Fan out your avocado, sprinkle those seeds evenly, drizzle your sauce lightly and carefully (you can always add more after the photo)! Make sure your ingredients are all looking fresh before plating, and remember, less is more sometimes. Don’t overcrowd!
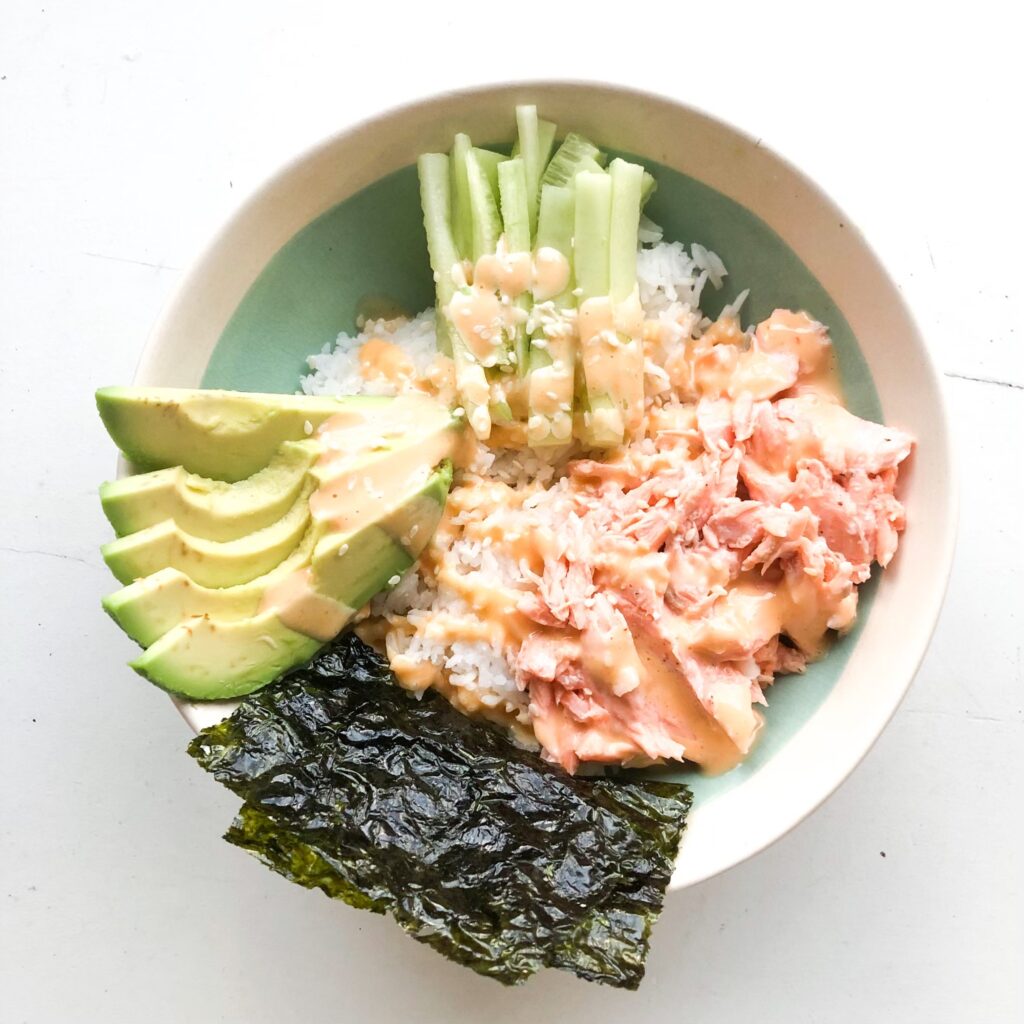
When I was pregnant I couldn’t have raw fish obviously, and on top of that we were trying to save money. So I got creative and made us some sushi bowls! Firstly, this meal is so easy and SO yummy. Secondly, LOOK AT THOSE BEAUTIFUL COLORS! I had to document. I made sure to fan the avocado, slice the cucumber evenly, plated the items so everything was visible (including the rice underneath), drizzled the Yum Yum sauce neatly, and sprinkled the sesame seeds just so.
6. Use nice plates, bowls, & serving platters!

The food is important, but similar to plating, it matters what you choose to present your food on! If you spend hours making a beautiful pie, don’t put it on a paper plate to take a photo! That will deter from the quality of what you made. Did you make something that is a bright color? Find something neutral or complimentary (reference a color wheel for this one). Did you make something that you want to show off, but it’s not so visually interesting? Find a plate or bowl that adds interest!
The glass cake stand under my lemon poppyseed cake added some texture, neutral color, and visual interest to this photo. If I had just put the cake on the table to photograph, it would have been a LOT of white/cream. This helps break it up without detracting from the cake itself.
7. Don’t be afraid to crop out some of your creation!
Sometimes cropping your photo does more than trying to fit it all in! Especially if one part of your dish looks great, and the other part doesn’t look so great. You don’t need to frame it perfectly square either. Fill the frame of your photos however you see fit.
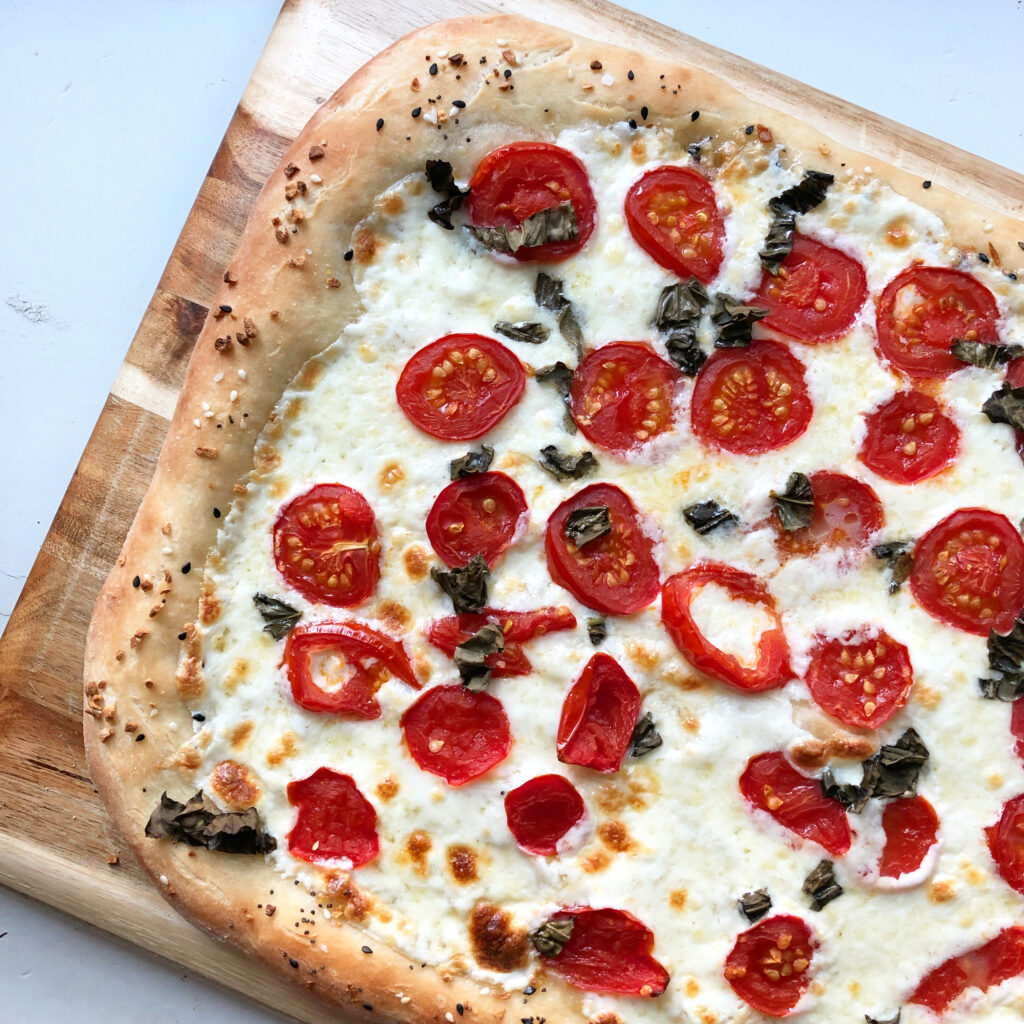
This pizza was so incredibly yummy, but half of it looked like a bit of a mess. I still wanted to document my efforts, but didn’t want the photo to reflect my mistakes (HAH, ain’t that the social media way). So, I just cropped it out! I also angled the cutting board and pizza so it filled the frame more and looked more visually interesting.
8. If you can’t crop it out, use angles to hide your food faux pas!

Let’s set the scene. You baked something you were so excited about and disaster strikes. You didn’t use enough grease and half of the cake stayed in the pan! I have done this. Boy have I done this so many times, especially with those bundt and loaf pans with all of the nooks and crannies. Don’t fret! You can still sometimes pull off a good shot! Use angles, use props to hide the problem area, OR here’s a thought… call yourself out. Take the photo anyway. We all make mistakes, but you can still take a pretty photo with all the flaws on display.
You can kind of tell, but probably wouldn’t have noticed if I hadn’t pointed it out, that the back of this lemon bundt cake is a crumbled mess. I always think it’s funny when I royally screw something up so I did call myself out, but I still think this photo is pretty!
9. Use props!
You’ve probably noticed that I like to use props. Sometimes they make sense. sometimes it’s just so I can add some visual interest to an otherwise boring photo. You made an apple pie? Add some leftover apples! Made some homemade pasta? Get a scoop of flour in a measuring cup and put it next to the pasta! This helps with the rule of thirds when composing your image. I like to add props to the corners of my images, but not always!
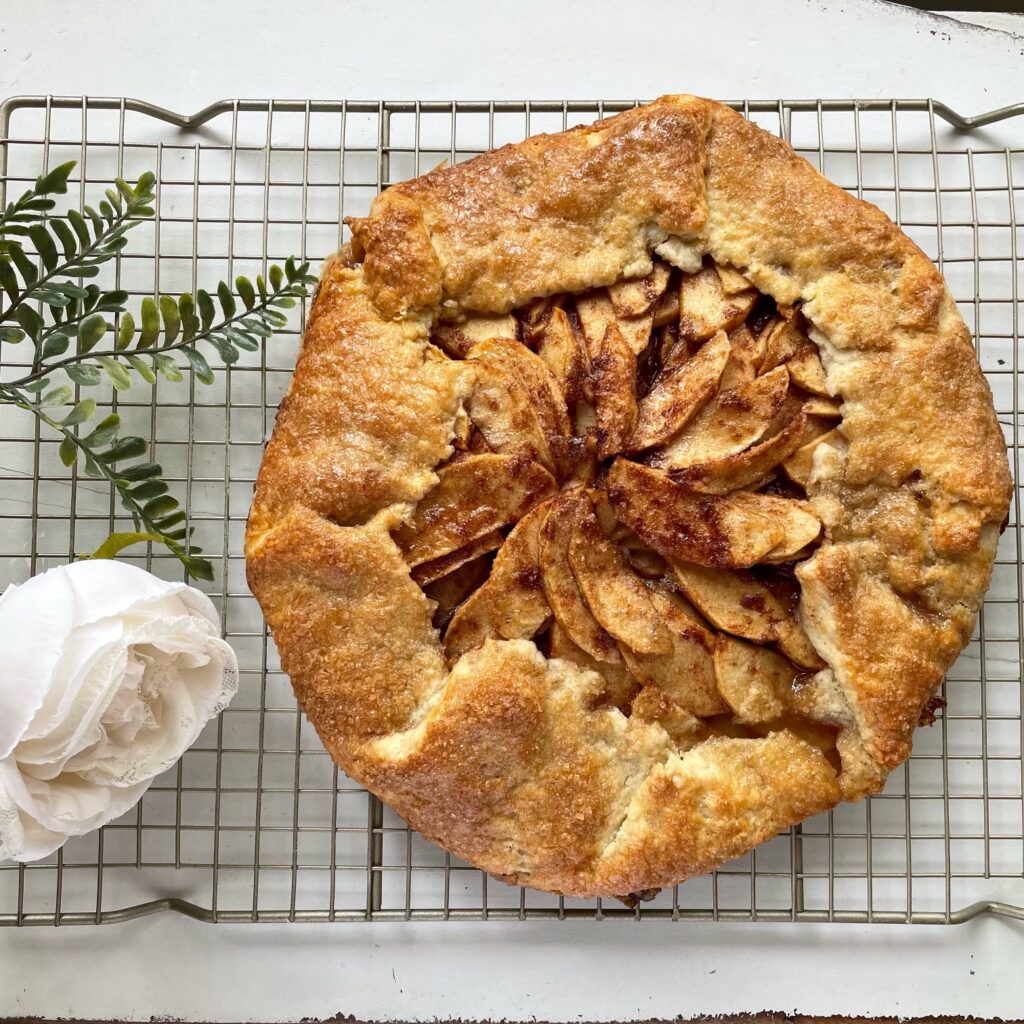
When I’m not feeling up to making a full pie, I make this rustic apple tart. It’s delicious and *sometimes* beautiful. I decided to photograph this one in particular because I was able to get this crust mostly even and wanted to document my accomplishment! I liked the way it looked on the cooling rack and added the greenery and flower to spice it up by offsetting the image so the tart wasn’t in the middle.
10. Edit, edit, edit!
The most important step is to edit! I would suggest using some sort of editing software prior to dropping into Instagram, but if that’s all you’ve got it can be pretty useful! I use the Photoshop app on my phone before sending to Instagram and that helps with lighting especially. There are more tools than in Instagram and I find I’m able to balance the whites better this way.
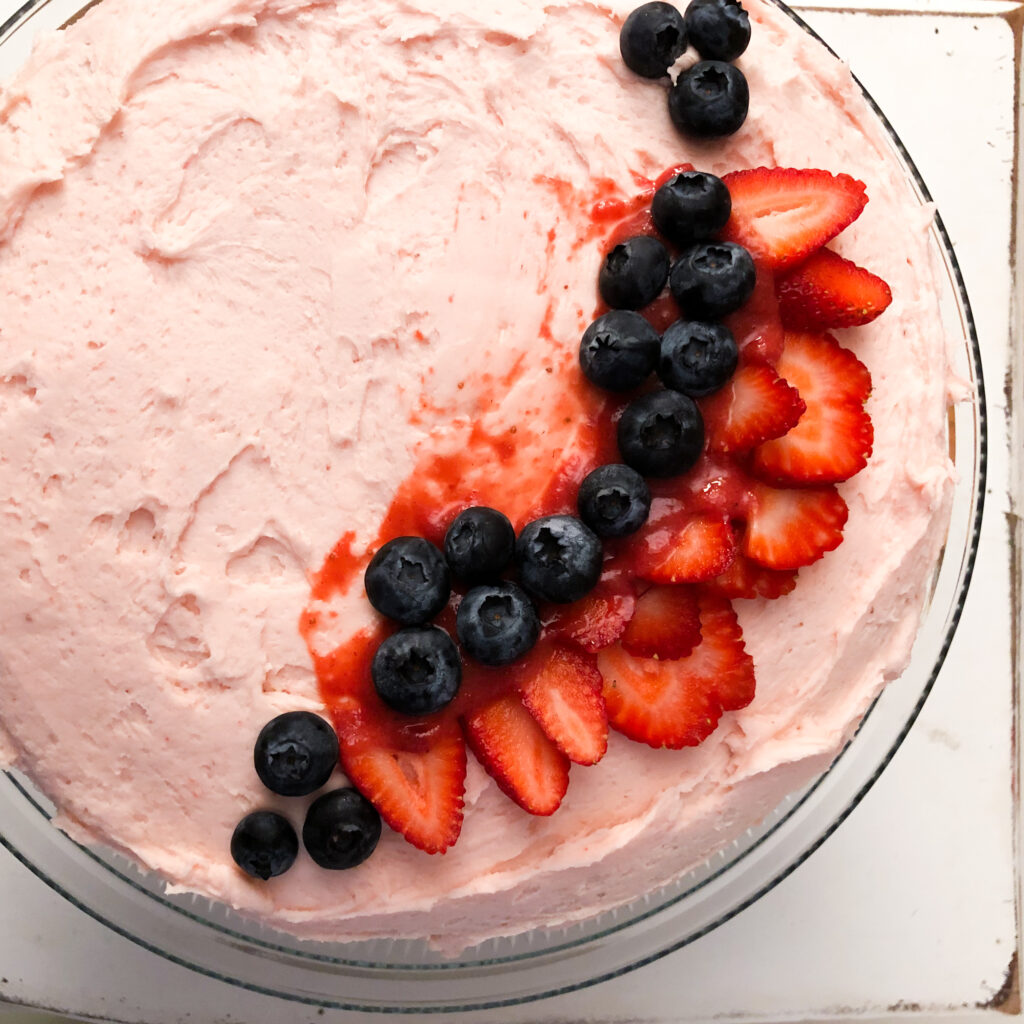
You would never know it by looking at this strawberry frosted chocolate cake, but the natural light was *almost* gone and I had to heavily edit to make it look like there was bright light. Editing tools are your friend. Use them.
Here’s a few extra small tips that you can utilize when taking photos of your food:

- Use a bounce card
- Shoot your photo in Square mode on your phone so you don’t have to crop later
- Shoot outside in the shade
- Take 1 million photos and edit them down to just 1
- Ask someone to look at the photos you chose and see what they like
- Look at Pinterest, see what others are doing
- Follow food hashtags on Instagram
- Keep going! You’ll get better the more you do it!
So, that’s how you can up your food photography game! Did these tips help you? Did you learn anything? Would you suggest anything else for someone hoping to take better food photos? Let me know!
Want to become an Emmy & Ollie Photography VIP member? Sign up here!


")

